 |
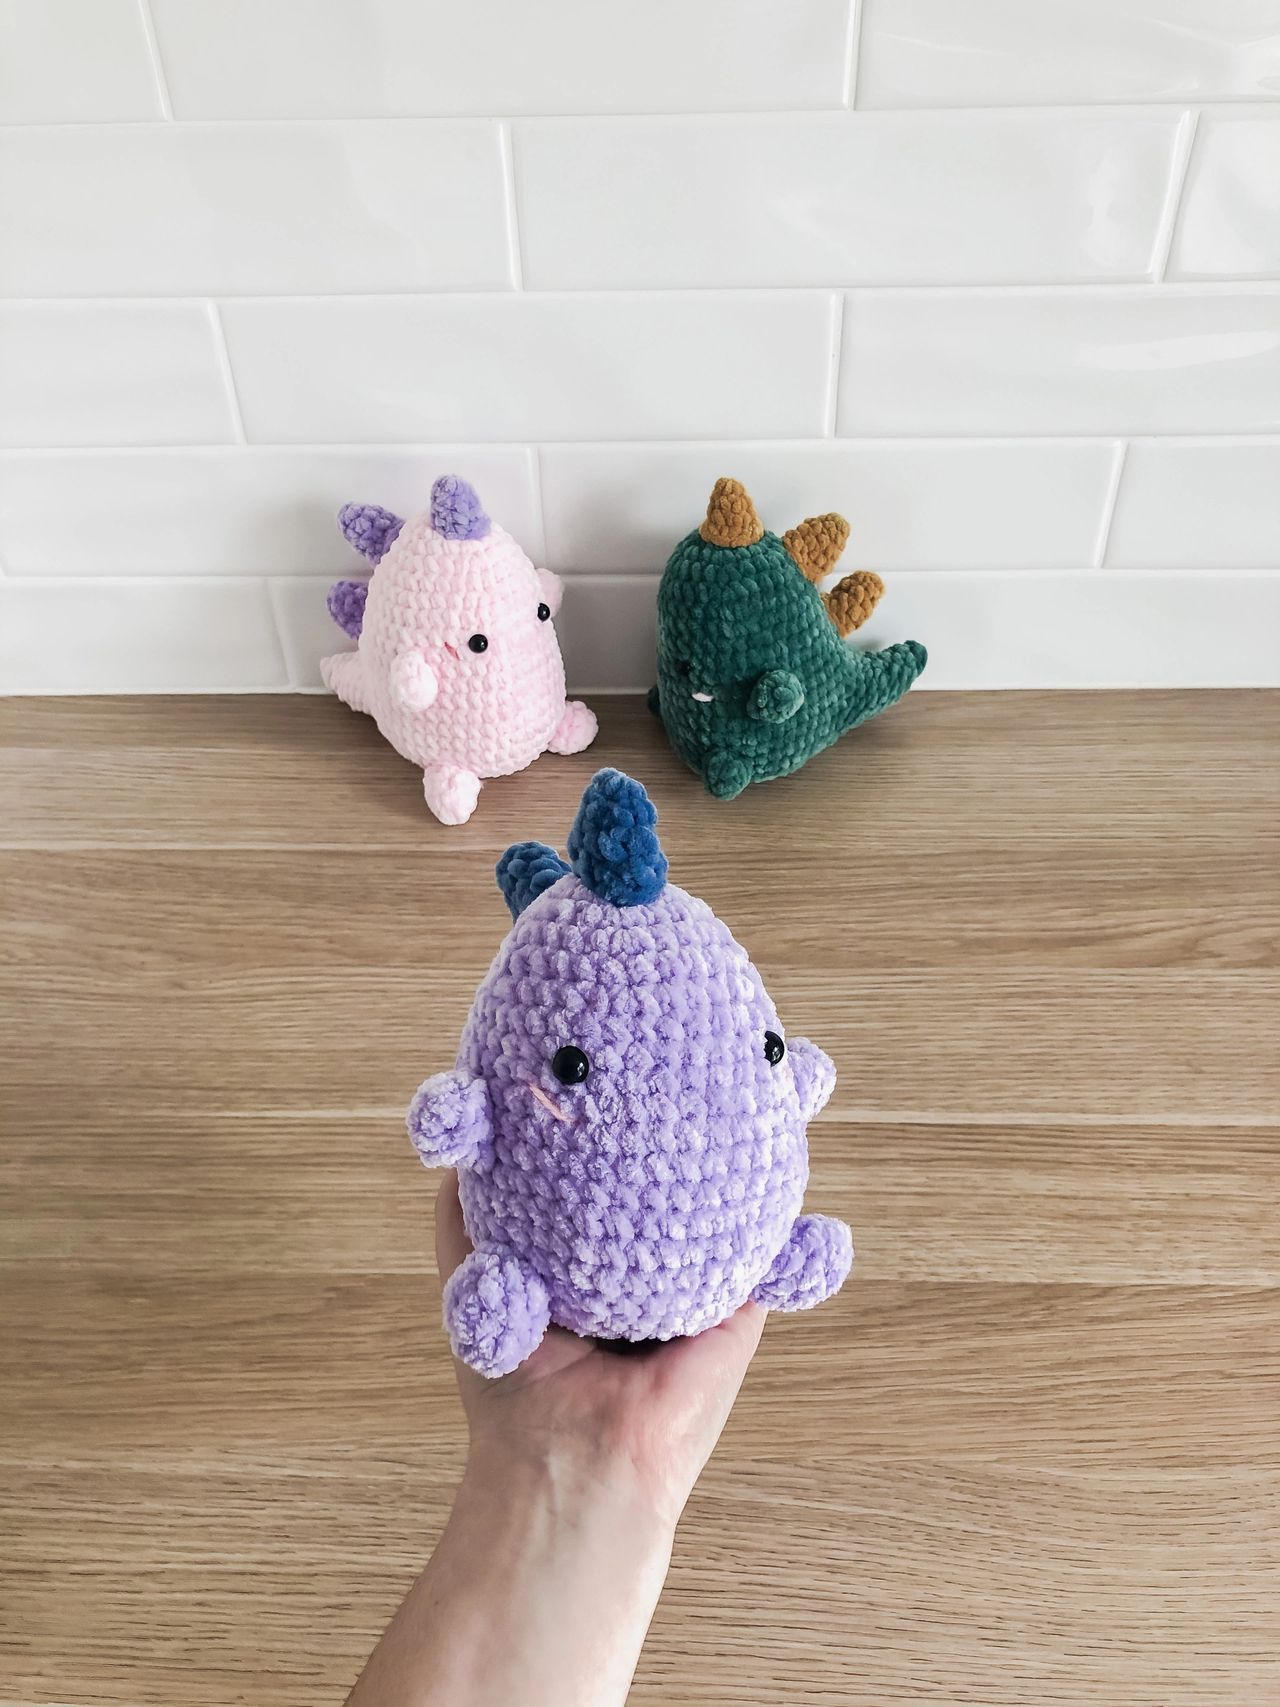
| Crochet Chonky Dinosaur - Free Crochet Pattern |
This is a crochet pattern to make this super chonky Dino. He's super chubby and cuddly! And you can make him with however many spikes you want!
Yarn used
- James C Brett Flutterby Chunky- Small amount of medium pink yarn for cheeks
Other Items used
- US G/4.25mm Crochet Hook- Yarn needle
- 9mm safety eyes
- Poly fill
- Stitch markers (optional)
*Please note that safety eyes are NOT recommended for children under the age of 3 years.
R2: Inc x 6 (12)
R3: (SC, inc) x 6 (18)
R4: (2SC, inc) x 6 (24)
R5: (3SC, inc) x 6 (30)
R6: 30 SC
R7: (4SC, inc) x 6 (36)
R8-10: 36 SC
R11: (5SC, inc) x 6 (42)
R12-14: 42 SC
R15: 34SC, ch 8, sk 8 (this is the tail hole)
R16-17: 42 SC
R18: (5SC, dec) x 6 (36)
Attach eyes between R9 and R10, about 8 sts apart (make sure eyes are on the opposite side to the tail hole)
R19: (4SC, dec) x 6 (30)
R20: (3SC, dec) x 6 (24)
R21: (SC, dec) x 8 (16)
Stuff the body
R22: Dec x 8 (8)
Close and cut the yarn, leaving a tail for sewing. Sew the hole closed.
Create standing SC into a stitch in the tail hole (I like to put this in the rightmost chain stitch, but any stitch can work)
(This counts as the first stitch of R1)
R1: 18 SC (So one SC into each of the 8 ch sts, the 8 skipped SC and the two side sts)
R2: (7SC, dec) x 2 (16)
R3: (6SC, dec) x 2 (14)
R4: (5SC, dec) x 2 (12)
R5: (4SC, dec) x 2 (10)
R6: (3SC, dec) x 2 (8)
R7: (2SC, dec) x 2 (6)
Stuff tail
R8: (SC, dec) x 2 (4)
Close and cut the yarn, leaving a tail for sewing. Sew the hole closed.
R1: 4 SC in a MR
R2: 4 inc (8)
R3: 8 SC
Close with a sl st. Cut the yarn, leaving a tail for sewing.
R2: 4 inc (8)
R3-4: 8 SC
Close with a sl st. Cut the yarn, leaving a tail for sewing.
R2: (SC, inc) x 2 (6)
R3: (2SC, inc) x 2 (8)
R4: (3SC, inc) x 2 (10)
Close with a sl st. Cut the yarn, leaving a tail for sewing.
R2: (SC, inc) x 2 (6)
R3: (2SC, inc) x 2 (8)
R4: (3SC, inc) x 2 (10)
R5: (4SC, inc) x 2 (12)
Close with a sl st. Cut the yarn, leaving a tail for sewing.
- Sew the legs on to the body (you can stuff the legs first if you wish)
- Embroider the cheeks
Abbreviations and stitches
• MR: Magic ring
• St(s): Stitch(es)
• SC: Single crochet
• Ch: Chain stitch
• Sk: skip a stitch
• Sl st: Slip stitch
• Inc: Increase (Stitch 2 SC into the stitch)
• Dec: SC decrease using the invisible method
• (...) x n: Repeat instructions in brackets n times
**This pattern uses US Crochet Terms**
Pattern
R1: 6 SC in a MRR2: Inc x 6 (12)
R3: (SC, inc) x 6 (18)
R4: (2SC, inc) x 6 (24)
R5: (3SC, inc) x 6 (30)
R6: 30 SC
R7: (4SC, inc) x 6 (36)
R8-10: 36 SC
R11: (5SC, inc) x 6 (42)
R12-14: 42 SC
R15: 34SC, ch 8, sk 8 (this is the tail hole)
R16-17: 42 SC
R18: (5SC, dec) x 6 (36)
Attach eyes between R9 and R10, about 8 sts apart (make sure eyes are on the opposite side to the tail hole)
R19: (4SC, dec) x 6 (30)
R20: (3SC, dec) x 6 (24)
R21: (SC, dec) x 8 (16)
Stuff the body
R22: Dec x 8 (8)
Close and cut the yarn, leaving a tail for sewing. Sew the hole closed.
Tail
(We crochet the tail directly into the tail hole: The 8 skipped SC, the 8 chain stitches, and the two stitches on the sides of the tail hole)Create standing SC into a stitch in the tail hole (I like to put this in the rightmost chain stitch, but any stitch can work)
(This counts as the first stitch of R1)
R1: 18 SC (So one SC into each of the 8 ch sts, the 8 skipped SC and the two side sts)
R2: (7SC, dec) x 2 (16)
R3: (6SC, dec) x 2 (14)
R4: (5SC, dec) x 2 (12)
R5: (4SC, dec) x 2 (10)
R6: (3SC, dec) x 2 (8)
R7: (2SC, dec) x 2 (6)
Stuff tail
R8: (SC, dec) x 2 (4)
Close and cut the yarn, leaving a tail for sewing. Sew the hole closed.
Front legs (Make 2)
R1: 4 SC in a MRR2: 4 inc (8)
R3: 8 SC
Close with a sl st. Cut the yarn, leaving a tail for sewing.
Back legs (Make 2)
R1: 4 SC in a MRR2: 4 inc (8)
R3-4: 8 SC
Close with a sl st. Cut the yarn, leaving a tail for sewing.
Small Spikes (Make 1)
R1: 4 SC in a MRR2: (SC, inc) x 2 (6)
R3: (2SC, inc) x 2 (8)
R4: (3SC, inc) x 2 (10)
Close with a sl st. Cut the yarn, leaving a tail for sewing.
Large Spikes (Make 2 or 3)
R1: 4 SC in a MRR2: (SC, inc) x 2 (6)
R3: (2SC, inc) x 2 (8)
R4: (3SC, inc) x 2 (10)
R5: (4SC, inc) x 2 (12)
Close with a sl st. Cut the yarn, leaving a tail for sewing.
Assembly
- Sew the spikes on to the head and the back- Sew the legs on to the body (you can stuff the legs first if you wish)
- Embroider the cheeks


Post a Comment