Crochet Heart - Free Pattern

Tuesday 28 December 2021


This is a free pattern to crochet this adorable little heart. It works up really quickly, and makes a great last minute gift. You can make it in all sorts of colours for Valentine's Day!


This heart would also look very cute as a keyring; it's the perfect size!

The full Youtube tutorial for this heart is located here


Yarn used

- James C Brett Flutterby Chunky - colour of your choice

Other Items used

- US G/4.25mm Crochet Hook
- Yarn needle
- Poly fill
- Stitch markers -optional

Abbreviations and stitches

• MR: Magic ring 
• St(s): Stitch(es) 
• SC: Single crochet 
• Inc: Increase (Stitch 2 SC into the stitch) 
• Dec: SC decrease using the invisible method 

• (...) x n: Repeat instructions in brackets n times
**This pattern uses US Crochet Terms**

Pattern

Top section of heart - make 2

R1: 6 SC in a MR
R2: 6 inc (12)
R3: 12 SC


First top section only: close and cut yarn after R3.

Second top section: don’t close after R3. Connect to 1st piece with 1SC (this is first SC of R4)


R4: 24 SC (12SC on first section, 12SC on second section)
R5: 24 SC
Sew hole closed using tail from first section

R6: (6SC, dec) x 3 (21)
R7: (5SC, dec) x 3 (18)
R8: (4SC, dec) x 3 (15)
R9: (3SC, dec) x 3 (12)
Stuff the heart


R10: (2SC, dec) x 3 (9)
R11: (SC, dec) x 3 (6)

Close and cut the yarn, leaving a tail for sewing.
Sew the hole closed and weave in the end.
Read More

Crochet Mushroom - Free Crochet Pattern

Friday 26 November 2021

Free mushroom crochet pattern 


This is a crochet pattern to make this cute little mushroom... perfect for nursery or child's room decor! It looks super cute when you make a few in different colours.
The finished size will depend on what yarn you use, as well as your tension and hook (as with any amigurumi). 

The full Youtube tutorial for this mushroom pattern is available here


Yarn used

- Hobbii Baby Snuggle - 2 colours (preferably white/cream for stem and spots)

Other Items used

- US G/4.25mm Crochet Hook
- Yarn needle
- Poly fill
- Stitch markers -optional

Abbreviations and stitches

• MR: Magic ring 
• St(s): Stitch(es) 
• SC: Single crochet 
• Inc: Increase (Stitch 2 SC into the stitch) 
• Dec: SC decrease using the invisible method 

• (...) x n: Repeat instructions in brackets n times
**This pattern uses US Crochet Terms**


Pattern

Cap

- Use colour of your choice

R1: 6 SC in a MR
R2: 6 inc (12)
R3: (SC, inc) x 6 (18)
R4: (2 SC, inc) x 6 (24)
R5: (3 SC, inc) x 6 (30)
R6: (4 SC, inc) x 6 (36)
R7-10: 36 SC
R11: (2SC, dec) x 9 (27)
Colour change to white/ cream
R12: (SC, dec) x 9 (18)
R13: (SC, dec) x 6 (12)
Stuff the cap
R14: 6 dec (6)
Close and cut the yarn, leaving a tail for sewing. Sew the hole closed.

Stem

- Use white/ cream yarn

R1: 6 SC in a MR
R2: 6 inc (12)
R3: (SC, inc) x 6 (18)
R4: 18 SC in BLO
R5: 18 SC
R6: (4 SC, dec) x 3 (15)
R7-8: 15 SC
R9: (3 SC, dec) x 3 (12)
R10-11: 12 SC
Close with sl st. Cut the yarn, leaving a tail for sewing on to cap.
Stuff the stem.

Spots

(Make 3 or more)

R1: 6 SC in a MR
Sl st back to 1st st
Cut the yarn, leaving a tail for sewing on to cap.


Assembly

- Sew spots on to cap
- Sew stem on to bottom of cap


Read More

Crochet Christmas Gnome - Free Crochet Pattern

Saturday 20 November 2021


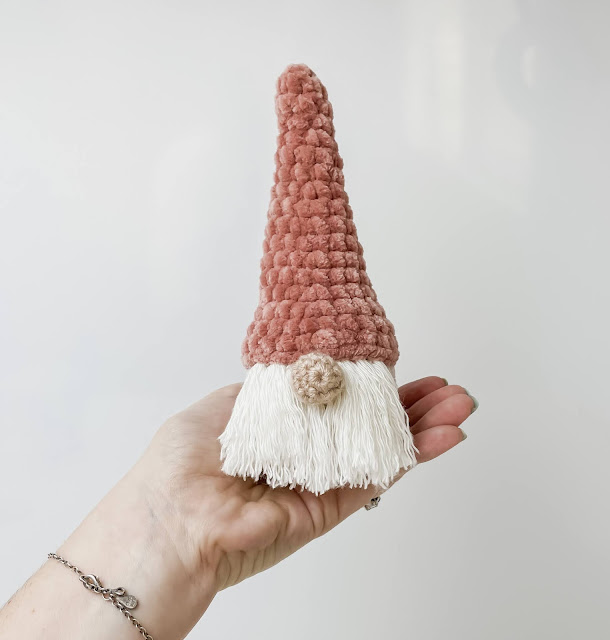
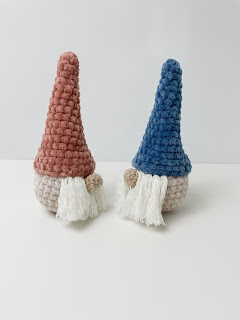
This is a crochet pattern to make this cute little gnome... perfect for Christmas! It looks super cute when you make a few in different colours.


The finished size will depend on what yarn you use, as well as your tension and hook (as with any amigurumi). 

The full Youtube tutorial for this gnome pattern is available here


Yarn used

- Hobbii Baby Snuggle - 2 colours
- Medium weight yarn for nose and hair

Other Items used

- US G/4.25mm Crochet Hook
- US E/3.5mm Crochet Hook
- Yarn needle
- Poly fill
- Weights (marbles, pebbles, beans, etc.) - optional
- Stitch markers -optional

Abbreviations and stitches

• MR: Magic ring 
• St(s): Stitch(es) 
• SC: Single crochet 
• Sl st: Slip stitch 
• Inc: Increase (Stitch 2 SC into the stitch) 
• Dec: SC decrease using the invisible method 
• (...) x n: Repeat instructions in brackets n times
**This pattern uses US Crochet Terms**

Pattern

Body

R1: 6 SC in a MR
R2: 6 inc (12)
R3: (SC, inc) x 6 (18)
R4: (2 SC, inc) x 6 (24)
R5-10: 24 SC
R11: (2 SC, dec) x 6 (18)
R12: (SC, dec) x 6 (12)
Fill halfway with pebbles, dry beans or other weights. Fill rest of the way with poly fill.
R13: 6 dec (6)
Close and cut the yarn, leaving a tail for sewing. Sew the hole closed.

Hat

R1: 6 SC in a MR
R2-4: 6 SC
R5: (SC, inc) x 3 (9)
R6-7: 9 SC
R8: (2 SC, inc) x 3 (12)
R9: 12 SC
R10: (3 SC, inc) x 3 (15)
R11: 15 SC
R12: (4 SC, inc) x 3 (18)
R13: 18 SC
R14: (5 SC, inc) x 3 (21)
R15: (6 SC, inc) x 3 (24)
R16-17: 24 SC
Close with a sl st and cut the yarn, leaving a tail for sewing

Nose

R1: 6 SC in a MR
R2: (SC, inc) x 3 (9)
R3: (2 SC, inc) x 3 (12)
R4: 6 dec (6)
Close with a sl st and cut the yarn, leaving a tail for sewing

Hair/ beard

Make +- 30 strands of white yarn, 10cm/4inch long
Attach hair/ beard  over 7 stitches above R9 and above R10
Attach more hair if desired

Assembly

Sew the nose on to the head, on top of the middle bottom knot of hair
Sew the hat on to the head, covering the top row of hair knots


Read More

Crochet Pear Bear - Free Crochet Pattern

Thursday 21 October 2021

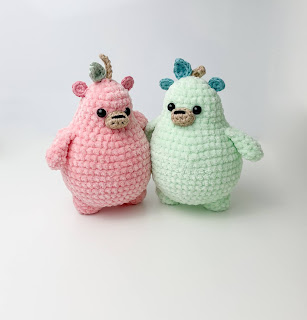
This is a crochet pattern to make this adorable Pear Bear. Please note the ORIGINAL Pear Bear pattern is by Kindly Crochet on Instagram - please check it out! The version here is designed for use with plush yarn for the body, and thinner yarn for the smaller details. Happy Crocheting!

There is a full Youtube tutorial for this pattern below:


Yarn used

- Super chunky plush yarn (main body colour of your choice) - I use James C Brett Flutterby Chunky
- Medium weight yarn: 2 or 3 colours of your choice (ears, muzzle, stem, leaf)

Other items

- US G / 4.25mm crochet hook (use with plush yarn)
- US E/ 3.5mm crochet hook (use with medium yarn)
- 9mm safety eyes
- Yarn needle
- Scissors
- Poly fill
- Stitch markers (optional)
*Please note that safety eyes are NOT recommended for children under the age of 3 years.

Pattern

Head/Body

(Plush yarn, size G hook)

R1: 6 SC in a MR
R2: 6 inc (12)
R3: (SC, inc) x 6 (18)
R4: (2SC, inc) x 6 (24)
R5-8: 24 SC

Eyes: Between R6 and R7, 4 sts apart

R9: (3SC, inc) x 6 (30)
R10: (4SC, inc) x 6 (36)
R11: (5SC, inc) x 6 (42)
R12: 42 SC
R13: (6SC, inc) x 6 (48)
R14-19: 48SC
R20: (6SC, dec) x 6 (42)
R21: (5SC, dec) x 6 (36)
R22: (4SC, dec) x 6 (30)
R23: (3SC, dec) x 6 (24)
R24: (2C, dec) x 6 (18)

Stuff

R25: (SC, dec) x 6 (12)
R26: 6 dec (6)

Close and sew the hole closed

Arms - Make 2

(Plush yarn, size G hook)

R1: 4SC in a MR
R2: 4 inc (8)
R3: 8SC
R4: (2SC, dec) x 2 (6)
R5-6: 6SC
SC closed along top


Legs - Make 2

(Plush yarn, size G hook)
R1: 5SC in a MR
R2: 5 inc (10)
R3: (SC, inc) x 5 (15)
R4: 15SC
Close with a sl st. Cut the yarn, leaving a tail for sewing.


Muzzle

(Medium yarn, size E hook)

Ch 5
R1: Start in 2nd ch from hook: 3SC, 3SC in same st
Underside: 2SC, inc, sl st to 1st SC
R2: 10SC
Close with a sl st. Cut the yarn, leaving a tail for sewing.

Ears - Make 2

(Medium yarn, size E hook)
R1: 8 SC in a MR
Sl st to first SC
Cut the yarn, leaving a tail for sewing.


Leaf

(Medium yarn, size E hook)
Ch 5
R1: Sl st in 2nd ch from hook, SC, HDC, 6 dc in last ch
Underside of chain: HDC, SC, sl st
Close and cut the yarn, leaving a tail for sewing

Stem

(Medium yarn, size E hook)
Attach yarn to top (middle) of head, and Ch 7
R1: Start in 2nd ch from hook: 6SC
Close and cut the yarn, and weave in the ends

Assembly

- Sew legs under body, stuffing before you reach the end
- Sew arms on to side of body
- Sew leaf next to stem
- Sew ears on top/side of head (one or two sts down from the leaf)
- Sew muzzle just under the eyes
- Embroider the nose on top of the muzzle

Read More

Crochet Flower Keyring - Free Crochet Pattern

Tuesday 19 October 2021


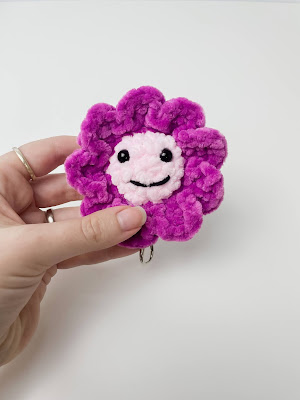
This is a crochet pattern to make this adorable flower keychain. It works up really quickly, and is a great little project to use up leftover yarn. It works as a keychain, or on its own... it's adorable either way!


Yarn used

- Hobbii Baby Snuggle - 2 or 3 colours. I like using one colour for the front, one colour for the back, and a third colour for the petals.

- Small amount of medium black or white yarn for mouth

Other Items used

- US G/ 4.25mm or 4.5mm Crochet Hook
- Yarn needle
- 6mm safety eyes
- Poly fill
- Stitch markers (optional)

*Please note that safety eyes are NOT recommended for children under the age of 3 years.

Abbreviations and stitches

• MR: Magic ring 
• St(s): Stitch(es) 
• SC: Single crochet 
• Sl st: Slip stitch 
• DC: Double Crochet
• Inc: Increase (Stitch 2 SC into the stitch) 
• Dec: SC decrease using the invisible method 
• (...) x n: Repeat instructions in brackets n times
**This pattern uses US Crochet Terms**

Pattern

Flower centre 

In front colour:

R1: 6 SC in a MR
R2: 6 inc (12)
R3: (SC, inc) x 6 (18)

Close with a sl st, and cut the yarn.

Add safety eyes and embroider the mouth.


In back colour

R1: 6 SC in a MR
R2: 6 inc (12)
R3: (SC, inc) x 6 (18)

Close with a sl st, and cut the yarn.

Petals

Attach circles by tying the tails from the magic rings together.

Going through both sides of the flower:

Insert the hook and pull through a loop

R1: Ch 1, 17SC, sl st back into 1st st (18)
R2: (Sl st, ch 2, 3 DC, ch 2, sl st) into 1 st, sk 1 (one petal)
Repeat for a total of 9 petals

Attach keychain to the leftover tails, or weave in the ends.

Read More

Crochet Bat - Free Crochet Pattern

Friday 8 October 2021


Crochet Bat - Free Pattern 


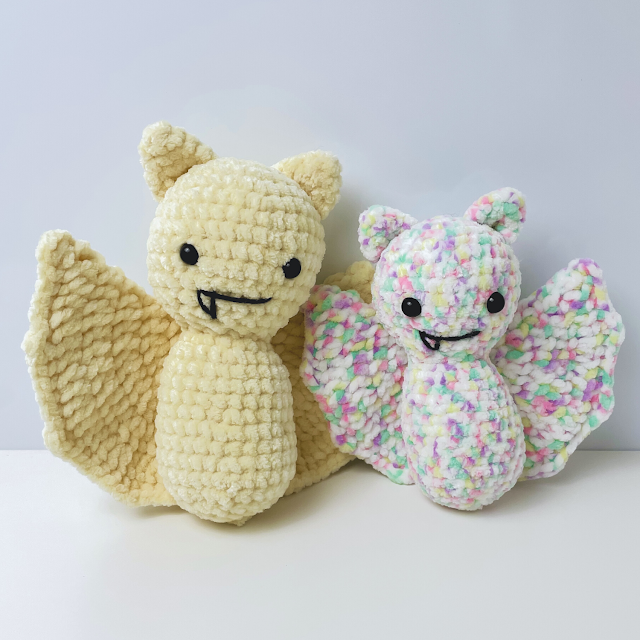
This is a crochet pattern to make this cute little bat... perfect for Halloween! He has double layered wings, which makes them nice and sturdy. His wings can also curl around him (Dracula style) which is super cute. 

The finished size will depend on what yarn you use, as well as your tension and hook (as with any amigurumi). 

The full Youtube tutorial for this bat pattern is available here

Yarn used

- James C Brett Flutterby Chunky
- Small amount of medium black or white yarn for mouth


Other Items used

- US G/4.25mm Crochet Hook
- Yarn needle
- 9mm safety eyes
- Poly fill
- Stitch markers (optional)

*Please note that safety eyes are NOT recommended for children under the age of 3 years.

Abbreviations and stitches

• MR: Magic ring
• St(s): Stitch(es)
• SC: Single crochet
• Sl st: Slip stitch
• HDC: Half Double Crochet
• DC: Double Crochet
• Inc: Increase (Stitch 2 SC into the stitch)
• Dec: SC decrease using the invisible method
• (...) x n: Repeat instructions in brackets n times
**This pattern uses US Crochet Terms**


Pattern

Head

(Spiral rounds)

R1: 6SC in a MR
R2: 6 inc (12)
R3: (SC, inc) x 6 (18)
R4: (2SC, inc) x 6 (24)
R5: (3SC, inc) x 6 (30)
R6: (4SC, inc) x 6 (36)
R7-10: 36SC
R11: (4SC, dec) x 6 (30)
R12: (3SC, dec) x 6 (24)

Eyes: Between R9 and R10, 7 sts apart

R13: (2SC, dec) x 6 (18)
R14: (SC, dec) x 6 (12)
R15: 12SC
R16: (SC, inc) x 6 (18)
R17: (2SC, inc) x 6 (24)
R18-20: 24SC
R21: (7SC, inc) x 3 (27)
R22-23: 27SC
R24: (8SC, inc) x 3 (30)
R25: 30SC
R26: (3SC, dec) x 6 (24)
R27: (2SC, dec) x 6 (18)
R28: (SC, dec) x 6 (12)
R29: 6 dec (6)

Ears

R1: 4SC in a MR
R2: (SC, inc) x 2 (6)
R3: (SC, inc) x 3 (9)
R4: (2SC, inc) x 2 (12)

Fold in half, SC closed along top

Wings

(Ch 3’s count as DC sts)

Into a MR:

R1: Ch 3, 15DC, sl st to top of Ch 3 (16)
R2: Ch 3, DC in same st, 15 DC Inc, sl st to top of Ch 3 (32)
R3: Ch 3, DC Inc, (DC, DC Inc) x 15, sl st to top of Ch 3 (48)
R4: Ch 3, DC, DC Inc, (2DC, DC Inc) x 15, sl st to top of Ch 3 (64)
R5: Ch 3, 2DC, DC Inc, (3DC, DC Inc) x 15, sl st to top of Ch 3 (80)
R6: Ch 3, 3DC, DC Inc, (4DC, DC Inc) x 15, sl st to top of Ch 3 (96)

Fold in half
Working back along both sides of the wing:
Ch 3, DC in same st,
(5SC, DC Inc) x 3,
10SC, DC inc,
(5SC, DC Inc) x 3

Close and cut the yarn, leaving a long tail for sewing
Bring tail through to middle for sewing on to the body.


Assembly

- Sew the ears on to the head

- Sew the body on to the centre of the wings

- Embroider the mouth using medium weight black/ white yarn


Read More

Crochet Chubby Penguin - Free Crochet Pattern

Tuesday 5 October 2021


Full Youtube tutorial available here
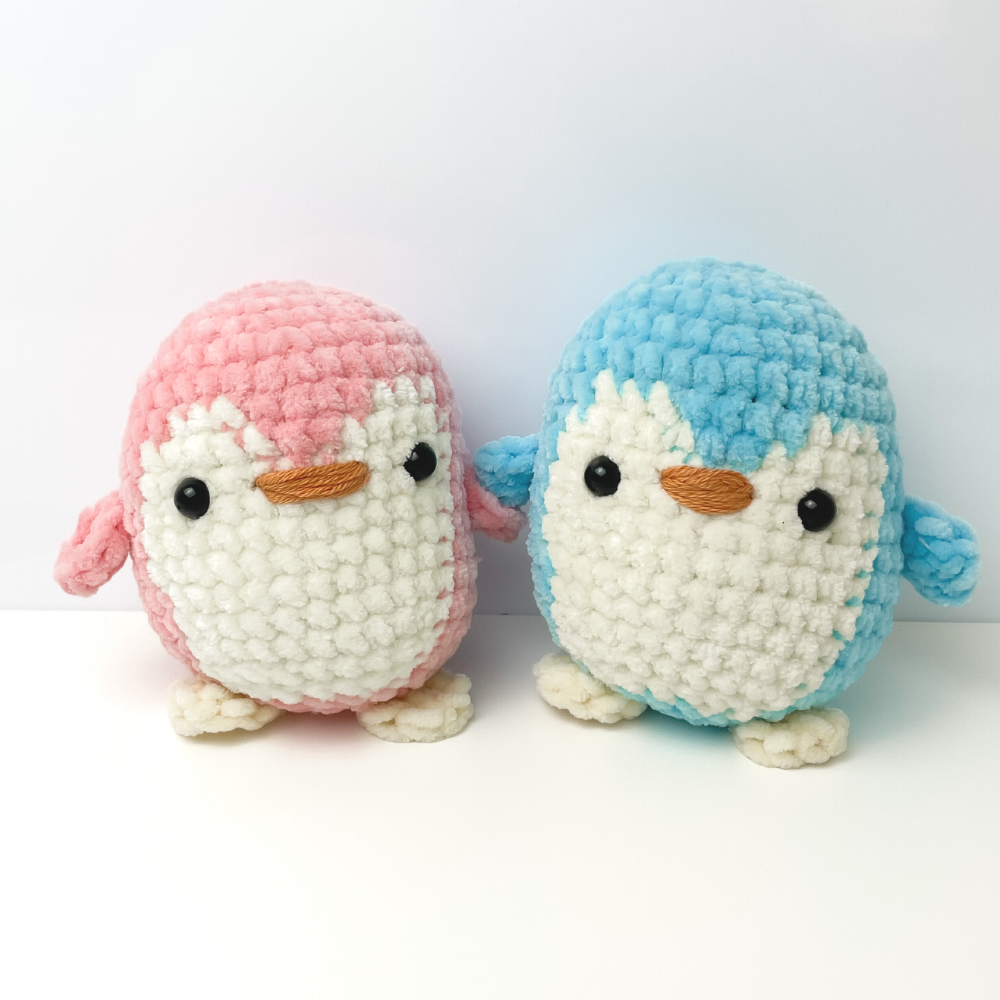
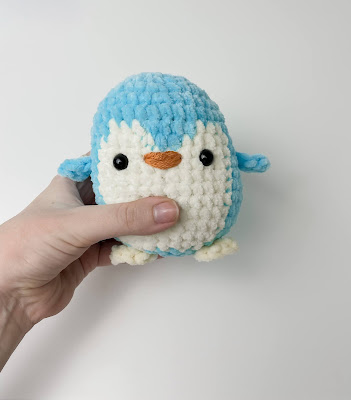
This is a crochet pattern to make this cute chubby penguin. You can make it in whatever colour you like!

Yarn used

- James C Brett Flutterby Chunky
- Small amount of medium orange yarn for beak

Other Items used

- US G/4.25mm Crochet Hook
- Yarn needle
- 9mm safety eyes
- Poly fill
- Stitch markers (optional)
*Please note that safety eyes are NOT recommended for children under the age of 3 years.

Abbreviations and stitches

• MR: Magic ring
• St(s): Stitch(es)
• SC: Single crochet
• Sl st: Slip stitch
• HDC: Half Double Crochet
• DC: Double Crochet
• Inc: Increase (Stitch 2 SC into the stitch)
• Dec: SC decrease using the invisible method
• (...) x n: Repeat instructions in brackets n times

**This pattern uses US Crochet Terms**

Pattern

Head/body

R1: 6 SC in a MR
R2: Inc x 6 (12)
R3: (SC, inc) x 6 (18)
R4: (2SC, inc) x 6 (24)
R5: (3SC, inc) x 6 (30)
R6: (4SC, inc) x 6 (36)
R7: 36 SC
R8: 13SC Pink, 3SC White, 4SC Pink, 3SC White, 13SC Pink (36)
R9: 12SC Pink, 5SC White, 2SC Pink, 5SC White, 12SC Pink (36)
R10-13: 12SC Pink, 12SC White, 12SC Pink (36)

Eyes: Between R10 and R11

R14-16: 13SC Pink, 11SC White, 12SC Pink (36)

R17:
Pink: (4SC, dec) x 2, 1SC
White: 3SC, dec, 4SC, dec
Pink: (4SC, dec) x 2
(30)

R18:
Pink: (3SC, dec) x 2, 1SC
White: 2SC, dec, 3SC, dec
Pink: (3SC, dec) x 2
(24)

Pink only from now on:
R19: (2SC, dec) x 6 (18)
Stuff the body
R20: (SC, dec) x 6 (12)
R21: Dec x 6 (6)
Close and cut the yarn, leaving a tail for sewing.
Sew the hole closed.

Wings and Feet

(2 x yellow and 2 x blue)


In a MR:
SC, 2 HDC, 3 DC, 2 HDC, SC
Close with a sl st. Cut the yarn, leaving a tail for sewing.

Assembly

Sew wings to side of body
Sew feet under body
Embroider the beak using orange yarn


Read More

Crochet Mushroom Boy - Free Crochet Pattern

Mushroom Boi - Free Pattern
Crochet Mushroom Boy - Free Crochet Pattern

Full video tutorial for Mushroom Boy is available on my Youtube Channel here

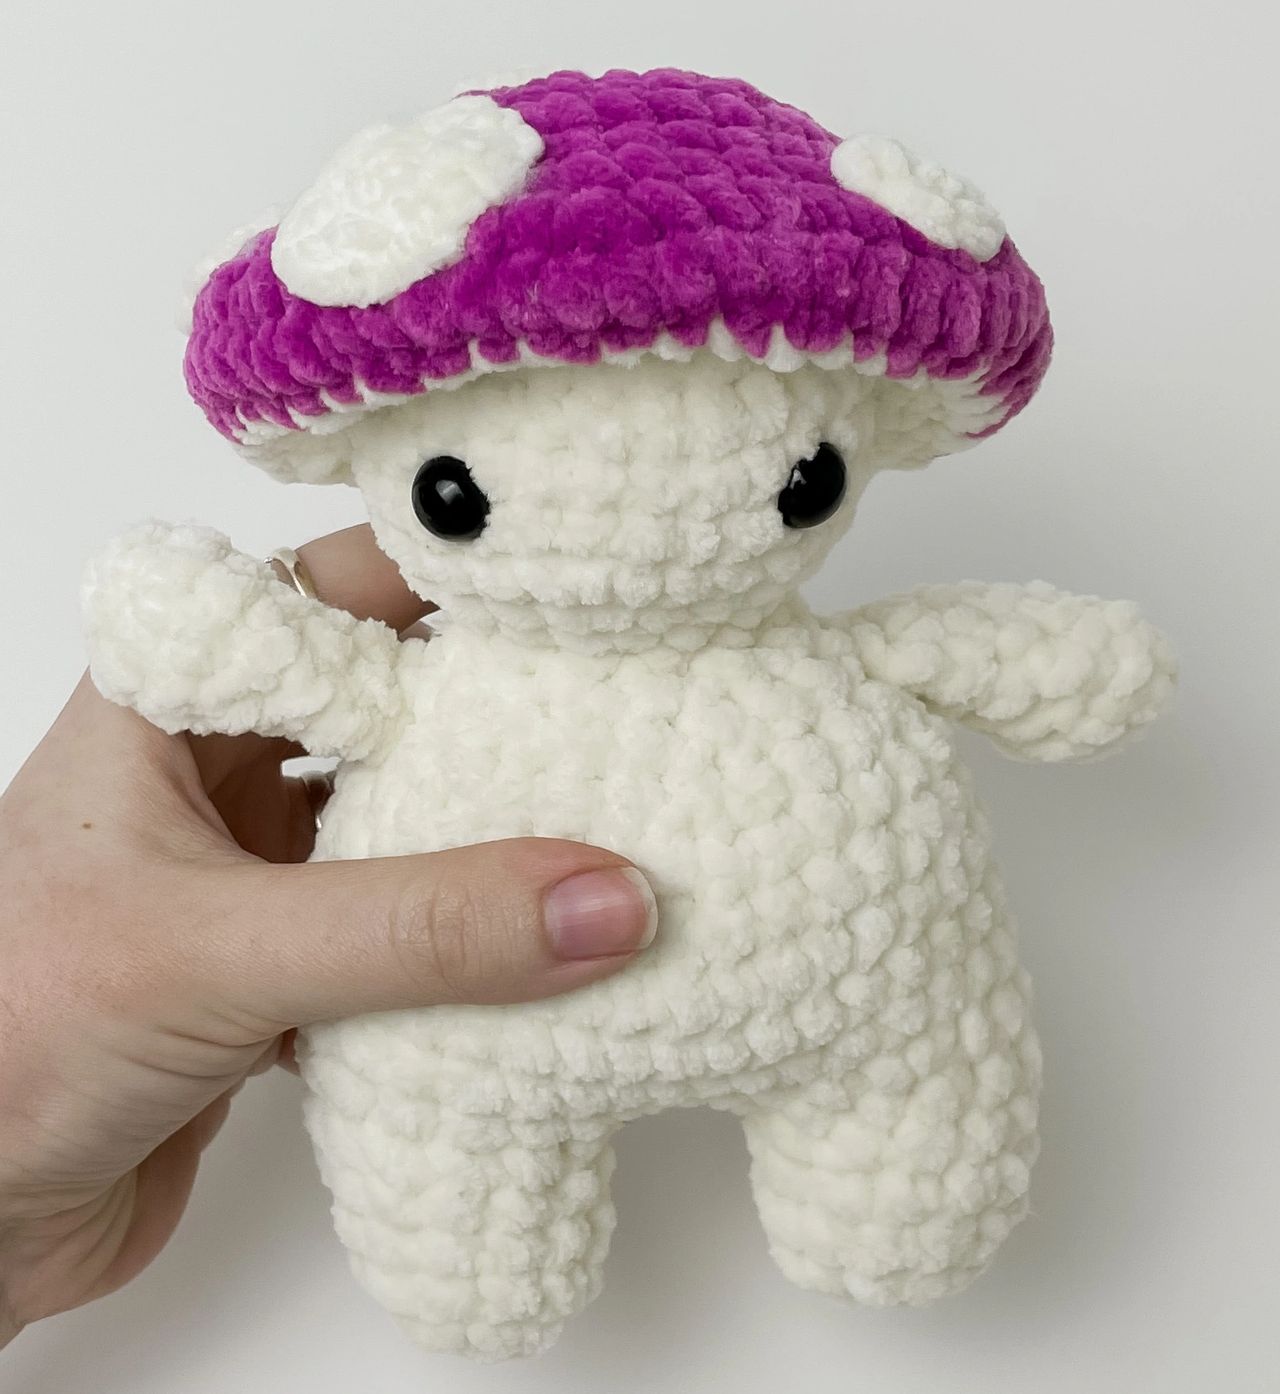
I love this little mushroom guy with his little mushroom cap. He's a super cuddly and chubby little fella. I particularly like him with a pink or red cap, but you can use any colour you wish!

Yarn used

- Hobbii Baby Snuggle

Other items

- 4.25mm Crochet Hook
- Safety Eyes
- Yarn needle
- Scissors
- Poly Fill
- Stitch markers (optional)
*Please note that safety eyes are NOT recommended for children under the age of 3 years.

Abbreviations and stitches

• MR: Magic ring
• St(s): Stitch(es)
• SC: Single crochet
• Ch: Chain stitch
• Sk: skip a stitch
• Sl st: Slip stitch
• Inc: Increase (Stitch 2 SC into the stitch)
• Dec: SC decrease using the invisible method
• (...) x n: Repeat instructions in brackets n times
**This pattern uses US Crochet Terms**


Legs - Make 2

R1: 6 SC in a MR
R2: 6 inc (12)
R3-5: 12 SC
1st leg only: sl st to close, cut the yarn

2nd leg:

Ch 3 after R5, join to 1st leg with SC (mark this stitch)
R1: 30 SC
(12SC in 1st leg, 3SC in ch3, 12SC in 2nd leg, 3SC in ch3)
R2: (4SC, inc) x 6 (36)
R3-5: 36SC
R6: (4SC, dec) x 6 (30)
R7: 30SC
R8: (3SC, dec) x 6 (24)
R9: (2SC, dec) x 6 (18)
R10: (SC, dec) x 6 (12)
R11: 12 SC
R12: (SC, inc) x 6 (18)
R13: (2SC, inc) x 6 (24)
R14: (3SC, inc) x 6 (30)
R15-17: 30SC
Eyes: between R15 & R16, 8 sts apart
R18: (3SC, dec) x 6 (24)
R19: (2SC, dec) x 6 (18)
R20: (SC, dec) x 6 (12)
R21: 6 dec (6)
Close and cut yarn
Sew the hole closed

Arms - Make 2

R1: 6 SC in a MR
R2: (SC, inc) x 3 (9)
R3: 9 SC
R4: (SC, dec) x 3 (6)
R5-6: 6 SC
SC closed along the top. Close and cut the yarn, leaving a tail for sewing

Mushroom cap

R1: 7 SC in a MR
R2: 7 inc (14)
R3: (SC, inc) x 7 (21)
R4: (2SC, inc) x 7 (28)
R5: (3SC, inc) x 7 (35)
R6: (4SC, inc) x 7 (42)
R7: (5SC, inc) x 7 (49)
R8: (6SC, inc) x 7 (56)
R9: 56 SC
Change to white yarn
R10: (2SC, dec) x 14 (42)
R11: (SC, dec) x 14 (28)
Sl st to close. Cut the yarn, leaving long tail for sewing.
Sew cap on to head using tail.

Small spot - Make 4

R1: 6SC in a MR

Sl st back to 1st st. Close and cut yarn, leaving tail for sewing.

Large spot - Make 2

R1: 6SC in a MR
R2: 6 inc (12)
Sl st to close. Cut yarn, leaving tail for sewing.

Assembly

- Sew spots on to cap
- Sew cap on to head
- Sew arms on to body

Read More

Crochet Reversible Octopus - Free Crochet Pattern

Crochet Reversible Octopus - Free Pattern

Full Youtube tutorial available here

This is a pattern for this super cute reversible crochet octopus. One side happy, one side sad, or even both sides happy if you prefer! The colour combinations are endless with this little guy.

I hope you enjoy this pattern!


**This pattern uses US Crochet Terms**

Yarn used

- Hobbii Baby Snuggle in 2 colours
- Small amount of medium weight black yarn for mouth

Items used

- US G/4.25mm Crochet Hook
- Yarn needle
- 12/15mm safety eyes
- Poly fill
- Stitch markers (optional)
*Please note that safety eyes are NOT recommended for children under the age of 3 years.

Abbreviations and stitches

• MR: Magic ring
• St(s): Stitch(es)
• SC: Single crochet
• Ch: Chain stitch
• Sk: skip a stitch
• Sl st: Slip stitch
• DC: Double Crochet
• HDC: Half Double Crochet
• Inc: Increase (Stitch 2 SC into the stitch)
• DC Inc: Double Crochet Increase (Stitch 2 DC into the stitch)
• Dec: SC decrease using the invisible method
• (...) x n: Repeat instructions in brackets n times


Body - Make twice in different colours

R1: 8 SC in a MR
R2: 8 inc (16)
R3: (SC, inc) x 8 (24)
R4: (2SC, inc) x 8 (32)
R5: (3SC, inc) x 8 (40)
R6: (4SC, inc) x 8 (48)
R7-11: 48 SC
R12: (4SC, dec) x 8 (40)
R13: (2SC, ch 7, Start 2nd ch from hook: 6 SC, SC2tog (base of ch & next SC of body), 2SC) x 8
R14: (2SC, 3HDC, 2DC, [DC Inc] x 2, 2DC, 3HDC, 3SC) x 8


- Attach eyes between R9 and R10, above front two tentacles
- Embroider on the smile/ frown
- Sew two sides together using tail from one side, stuffing as you go

Read More

Crochet Squishy Cow - Free Crochet Pattern

Crochet Squishy Cow
Crochet Squishy Cow - Free Crochet Pattern

This is a pattern for this super chubby, squishy cow. The full video tutorial is available here


** This pattern uses US Crochet Terms**

Yarn used

- James C Brett Flutterby Chunky (3 colours)
- Small amount of medium weight pink/ black yarn for nostrils

Other items used

- US G/ 4.25mm crochet hook
- Yarn needle
- Poly fill
- Safety eyes
- Stitch markers (optional)
*Please note that safety eyes are NOT recommended for children under the age of 3 years.

Abbreviations and stitches

• MR: Magic ring
• St(s): Stitch(es)
• SC: Single crochet
• Ch: Chain stitch
• Sk: skip a stitch
• Sl st: Slip stitch
• HDC: Half Double Crochet
• HDC inc: Half Double Crochet Increase (Stitch 2 HDC into the stitch)
• Inc: Increase (Stitch 2 SC into the stitch)
• Dec: SC decrease using the invisible method
• (...) x n: Repeat instructions in brackets n times


Body

R1: 6 SC in a MR
R2: 6 inc (12)
R3: (SC, inc) x 6 (18)
R4: (2SC, inc) x 6 (24)
R5: (3SC, inc) x 6 (30)
R6: (4SC, inc) x 6 (36)
R7: (5SC, inc) x 6 (42)
R8: (6SC, inc) x 6 (48)
R9-17: 48SC (9 rounds)
R18: (6SC, dec) x 6 (42)
R19: (5SC, dec) x 6 (36)
Place safety eyes between R9 and R10, about 8 sts apart
R20: (4SC, dec) x 6 (30)
R21: (3SC, dec) x 6 (24)
R22: (2SC, dec) x 6 (18)
R23: (SC, dec) x 6(12)
R24: 6 dec (6)
Close and cut the yarn. Sew the hole closed.

Snout

R1: Ch 6, SC in 2nd ch from hook, 3SC, 3SC into last st,
Underside: 3SC, inc, sl st into 1st st of round (12)
R2: (3SC, 3 inc ) x 2
Sl st to close, and cut the yarn, leaving a tail for sewing

Ears - Make 2 (One in each colour)

R1: 6 SC in a MR (6)
R2: (SC, inc) x 3 (9)
R3: (2SC, inc) x 3 (12)
R4-5: 12 SC
R6: (2SC, dec) x 3 (9)
Sl st to close. Cut the yarn, leaving a tail for sewing


Spots - Make 2

R1: 6 SC in a MR
R2: 6 inc (12)
R3: (SC, inc) x 6 (18)
R4: (2SC, inc) x 6 (24)
R5: (3SC, inc) x 6 (30)
R6: (Inc, HDC Inc, inc, 2 sl st) x 6 (48)
Sl st to close. Cut the yarn, leaving a tail for sewing

Horns - Make 2

R1: 5SC in a MR
R2-3: 5 SC
Sl st to close. Cut the yarn, leaving a tail for sewing


Assembly

- Sew the snout between the eyes
- Sew the spots in place (top left and bottom right)
- Sew the ears and horns on to the head
- Embroider the nostrils
- Embroider the inner ear with white yarn if desired

Read More

Crochet Rainbow Bee - Free Crochet Pattern

Crochet Rainbow Bee
Crochet Rainbow Bee - Free Crochet Pattern

I just love the colours of this rainbow bee. You can of course make him in any colour combination - the possibilities are endless!

There is a full Youtube Tutorial for this bee located here


Yarn used

- Hobbii Baby Snuggle - various colours
- Small amount of medium weight black yarn for mouth

Other items

- US G / 4.25mm Crochet Hook
- 9mm Safety Eyes
- Stitch markers (optional)
- Poly Fill
- Yarn needle
*Please note that safety eyes are NOT recommended for children under the age of 3 years.

Abbreviations and stitches

• MR: Magic ring
• St(s): Stitch(es)
• SC: Single crochet
• Ch: Chain stitch
• Sk: skip a stitch
• Sl st: Slip stitch
• Inc: Increase (Stitch 2 SC into the stitch)
• Dec: SC decrease using the invisible method
• (...) x n: Repeat instructions in brackets n times

Pattern

R1: 6 SC in a MR
R2: 6 inc (12)
R3: (SC, inc) x 6 (18)
R4: (2SC, inc) x 6 (24)
R5: (3SC, inc) x 6 (30)
R6-7: 30 SC


- Attach eyes where desired
- Embroider on mouth

Colour change
R8-9: 30 SC

Colour change
R10-11: 30 SC

Colour change
R12-13: 30 SC

Colour change
R14: (3SC, dec) x 6 (24)
R15: (2SC, dec) x 6 (18)

Colour change
R16: (SC, dec) x 6 (12)
R17: (SC, dec) x 4 (8)
R18: 8 SC
R19: 4 dec (4)
Fasten off, and sew the hole closed

Wings

R1: 6 SC in a MR
R2: 6 inc (12)
R3: (3SC, inc) x 3 (15)
Close with a sl st and cut the yarn, leaving a tail for sewing on to the body


Assembly

Sew the wings on to the back of the bee

Read More

Easy Crochet Octopus - Free Crochet Pattern


Full Youtube tutorial for this octopus is available here
This is a really cute and quick crochet octopus. It's a great project to use up leftover yarn... I hope you enjoy this pattern!

Yarn used

- Hobbii Baby Snuggle
- Small amount of medium weight black yarn for mouth

Items used

- US G/4.25mm Crochet Hook
- Yarn needle
- 9mm safety eyes
- Poly fill
- Stitch markers (optional)
*Please note that safety eyes are NOT recommended for children under the age of 3 years.

Abbreviations and stitches

• MR: Magic ring
• St(s): Stitch(es)
• SC: Single crochet
• Ch: Chain stitch
• Sk: skip a stitch
• Sl st: Slip stitch
• Inc: Increase (Stitch 2 SC into the stitch)
• Dec: SC decrease using the invisible method
• (...) x n: Repeat instructions in brackets n times


Pattern

(starts at top of the head and works down)
R1: 6 SC in a MR
R2: 6 inc (12)
R3: (SC, inc) x 6 (18)
R4: (2SC, inc) x 6 (24)
R5-7: 24 SC
R8: (SC, dec) x 8 (16)

Place a stitch marker in the front loop of 1st st of R8 - this is where we are going to start crocheting the tentacles later!
Eyes: between R6 and R7, 7 or 8 sts apart

R9 (BLO): 16 SC
R10: 8 dec (8)
Close and cut the yarn - sew the hole closed with the tail.

Tentacles


First tentacle:

Standing SC into marked st,
Ch 20
Start in 2nd ch from hook: 19 SC
Sl st into next st on body

Rest of the tentacles:

(SC, Ch 20, Start in 2nd ch from hook: 19 inc, SC into next st on body) x 7

Read More

Crochet Stingray - Free Crochet Pattern


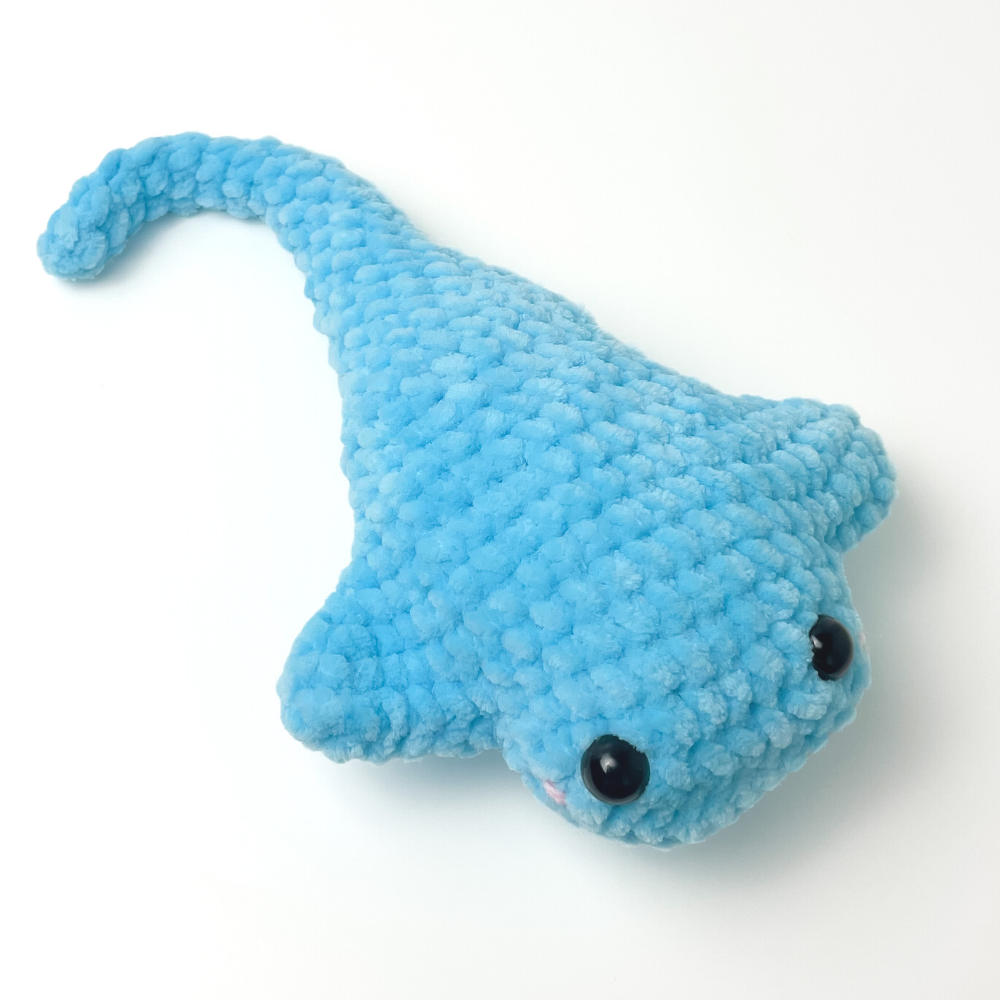
Full Youtube tutorial for this stingray is available here.  
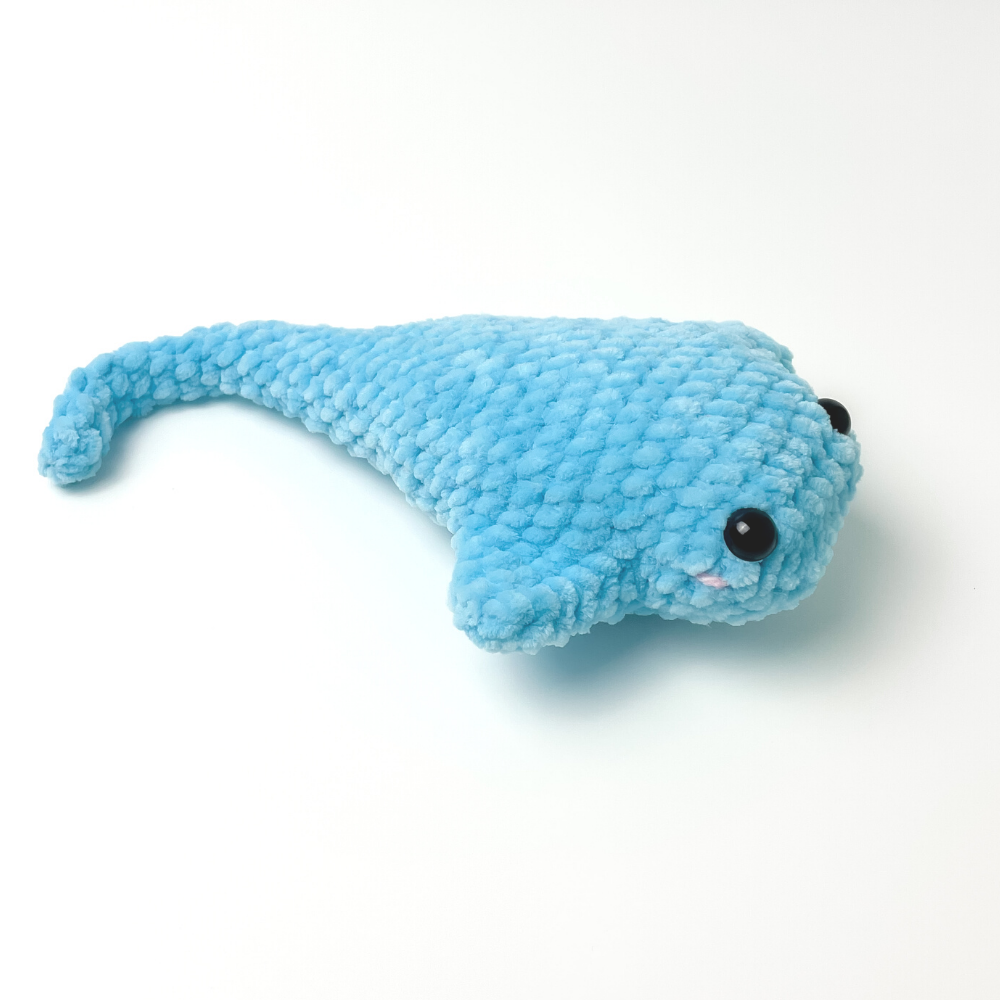
This is a really cute and quick crochet stingray. No sewing required! You can make him with a curled or straight tail.

Pattern inspired by Stingray by Yarnolog - this pattern is specifically designed for plush chunky yarn.

Yarn used

- James C Brett Flutterby Chunky
- Small amount of medium weight pink yarn for cheeks

Items used

- US G/4.25mm Crochet Hook
- Yarn needle
- 9mm safety eyes
- Poly fill
- Stitch markers (optional)
- Pipe cleaner (optional - for curled tail)
*Please note that safety eyes are NOT recommended for children under the age of 3 years.

Abbreviations and stitches

• St(s): Stitch(es)
• SC: Single crochet
• Ch: Chain stitch
• Sk: skip a stitch
• Sl st: Slip stitch
• Inc: Increase (Stitch 2 SC into the stitch)
• Dec: SC decrease using the invisible method
• (...) x n: Repeat instructions in brackets n times


Pattern

(We start at the front of the face and work back along the body)
Start with a slip knot. Ch 10.
R1: Start in 2nd ch from hook: 8SC, 3SC in same st, 7SC, 3SC in same st (21)
R2: Inc, 7SC, Inc, SC, Inc, 8SC, Inc, 1SC (25)
R3: 25SC
R4: 12SC, ch 6, 5SC back along ch, base dec, 12SC, ch 6, 5SC back along ch (47)
R5: Dec (base of ch & next st), 11 SC, 4SC in ch, 2 inc, 4SC, 13SC, 4SC in ch, 2 inc, 4SC (49)
(Please see Youtube video tutorial for detailed instruction on how to combine the base of the chain with the next stitch - this ensures there are no gaps!)

R6: 49SC
R7: 17SC, 2 dec, 20SC, 2 dec, 4 SC (45)
R8: Dec, 9SC, dec, 3SC, 2 dec, 3SC, dec, 8SC, dec, 3sc, 2 dec, 3SC (37)
R9: 12SC, 2 dec, 16SC, 2 dec, 1SC (33)
R10: 11SC, 2 dec, 14SC, 2 dec (29)
R11: 10SC, 2 dec, 11SC, 2 dec (25)
R12: Dec, 7SC, dec, 14SC (23)
R13-14: 23SC
Eyes: Between R2 & R3, with 6 or 7 sts between
R15: Dec, (SC, dec) x 7 (15)
R16: 15SC
R17: (3SC, dec) x 3 (12)
R18: 12SC
Stuff the body


R19: (4SC, dec) x 2 (10)
R20-21: 10SC
R22: (3SC, dec) x 2 (8)
R23-24: 8 SC
R25: (2SC, dec) x 2 (6)
R26-34: 6SC
Close and cut the yarn. Sew the hole closed.

Embroider the cheeks if desired.

Insert pipe cleaner into the tail if you want it curved.

**Please note: the video tutorial has the last two lines of the pattern numbered incorrectly, as it misses round 25. The pattern steps remain the same, however.


Read More

Crochet Chonky Dinosaur - Free Crochet Pattern

Crochet Chonky Dinosaur
Crochet Chonky Dinosaur - Free Crochet Pattern 
Full Youtube tutorial available here

This is a crochet pattern to make this super chonky Dino. He's super chubby and cuddly! And you can make him with however many spikes you want!

Yarn used

- James C Brett Flutterby Chunky
- Small amount of medium pink yarn for cheeks

Other Items used

- US G/4.25mm Crochet Hook
- Yarn needle
- 9mm safety eyes
- Poly fill
- Stitch markers (optional)
*Please note that safety eyes are NOT recommended for children under the age of 3 years.

Abbreviations and stitches

• MR: Magic ring
• St(s): Stitch(es)
• SC: Single crochet
• Ch: Chain stitch
• Sk: skip a stitch
• Sl st: Slip stitch
• Inc: Increase (Stitch 2 SC into the stitch)
• Dec: SC decrease using the invisible method
• (...) x n: Repeat instructions in brackets n times


**This pattern uses US Crochet Terms**

Pattern

R1: 6 SC in a MR
R2: Inc x 6 (12)
R3: (SC, inc) x 6 (18)
R4: (2SC, inc) x 6 (24)
R5: (3SC, inc) x 6 (30)
R6: 30 SC
R7: (4SC, inc) x 6 (36)
R8-10: 36 SC
R11: (5SC, inc) x 6 (42)
R12-14: 42 SC
R15: 34SC, ch 8, sk 8 (this is the tail hole)
R16-17: 42 SC
R18: (5SC, dec) x 6 (36)

Attach eyes between R9 and R10, about 8 sts apart (make sure eyes are on the opposite side to the tail hole)

R19: (4SC, dec) x 6 (30)
R20: (3SC, dec) x 6 (24)
R21: (SC, dec) x 8 (16)
Stuff the body
R22: Dec x 8 (8)

Close and cut the yarn, leaving a tail for sewing. Sew the hole closed.

Tail

(We crochet the tail directly into the tail hole: The 8 skipped SC, the 8 chain stitches, and the two stitches on the sides of the tail hole)

Create standing SC into a stitch in the tail hole (I like to put this in the rightmost chain stitch, but any stitch can work)
(This counts as the first stitch of R1)

R1: 18 SC (So one SC into each of the 8 ch sts, the 8 skipped SC and the two side sts)
R2: (7SC, dec) x 2 (16)
R3: (6SC, dec) x 2 (14)
R4: (5SC, dec) x 2 (12)
R5: (4SC, dec) x 2 (10)
R6: (3SC, dec) x 2 (8)
R7: (2SC, dec) x 2 (6)
Stuff tail
R8: (SC, dec) x 2 (4)
Close and cut the yarn, leaving a tail for sewing. Sew the hole closed.


Front legs (Make 2)

R1: 4 SC in a MR
R2: 4 inc (8)
R3: 8 SC
Close with a sl st. Cut the yarn, leaving a tail for sewing.

Back legs (Make 2)

R1: 4 SC in a MR
R2: 4 inc (8)
R3-4: 8 SC
Close with a sl st. Cut the yarn, leaving a tail for sewing.

Small Spikes (Make 1)

R1: 4 SC in a MR
R2: (SC, inc) x 2 (6)
R3: (2SC, inc) x 2 (8)
R4: (3SC, inc) x 2 (10)
Close with a sl st. Cut the yarn, leaving a tail for sewing.

Large Spikes (Make 2 or 3)

R1: 4 SC in a MR
R2: (SC, inc) x 2 (6)
R3: (2SC, inc) x 2 (8)
R4: (3SC, inc) x 2 (10)
R5: (4SC, inc) x 2 (12)
Close with a sl st. Cut the yarn, leaving a tail for sewing.

Assembly

- Sew the spikes on to the head and the back
- Sew the legs on to the body (you can stuff the legs first if you wish)
- Embroider the cheeks


Read More

Crochet Seahorse - Free Crochet Pattern

Crochet Seahorse - Free Crochet Pattern 


Full Youtube tutorial available here


This is a crochet pattern to make this cute seahorse. You can make it in whatever colour you like!


Yarn used

- James C Brett Flutterby Chunky

Other Items used

- US G/4.25mm Crochet Hook
- Yarn needle
- 12-15mm safety eyes
- Poly fill
- Stitch markers (optional)
*Please note that safety eyes are NOT recommended for children under the age of 3 years.

Abbreviations and stitches

• MR: Magic ring
• St(s): Stitch(es)
• SC: Single crochet
• Sl st: Slip stitch
• DC: Double Crochet
• BLO: Back Loops Only
• Picot stitch (see video tutorial for detail instruction)
• Inc: Increase (Stitch 2 SC into the stitch)
• Dec: SC decrease using the invisible method
• (...) x n: Repeat instructions in brackets n times


**This pattern uses US Crochet Terms**


Pattern

Head

R1: 6 SC in a MR
R2: 6 inc (12)
R3: (SC, inc) x 6 (18)
R4: (2SC, inc) x 6 (24)
R5: (3SC, inc) x 6 (30)
R6: (4SC, inc) x 6 (36)
R7: (5SC, inc) x 6 (42)
R8-12: 42 SC
R13: (5SC, dec) x 6 (36)
R14 : (4SC, dec) x 6 (30)

Eyes: between R10 and R11 (14st apart)

R15: (3SC, dec) x 6 (24)
R16: (2SC, dec) x 6 (18)
Stuff
R17: (SC, dec) x 6 (12)
R18: 12SC
R19: (3SC, inc) x 3 (15)
R20: (4SC, inc) x 3 (18)
R21: (5SC, inc) x 3 (21)
R22: (6SC, inc) x 3 (24)
R23: (7SC, inc) x 3 (27)
R24: (8SC, inc) x 3 (30)
R25: 30SC
R26: 30 SC (or till back of piece)
R27: 6SC, (SC, dec) x 6 , 6SC (24)
R28: 6SC, (SC, dec) x 4, 6SC (20)
R29: 4SC, (SC, dec) x 4, 4SC (16)
R30: 2SC, (SC, dec) x 4, 2SC (12)
R31: 12 SC
Stuff
R32: 5SC, dec, 5SC (11)
R33: 4SC, dec, 5SC (10)
R34: 4SC, dec, 4SC (9)
R35: 3SC, dec, 4SC (8)
R36: 3SC, dec, 3SC (7)
R37-44: 7SC
Close and cut the yarn, leaving a long tail for sewing.
Roll up the tail and secure with yarn tail.

Coronet (frilly bit on top of the head)

Ch 28
R1: Sl st in 4th ch from hook,
(SC, picot, sl st) x 12
Close and cut the yarn, leaving a long tail for sewing.

Fins

Ch 3
Start in 3rd ch from the hook: 3 DC, ch1, turn
2 SC in each stitch (6)
Close and cut the yarn, leaving a long tail for sewing.

Snout

R1: 6 SC in a MR
R2: 6 SC in BLO
R3: 6 SC
R4: 6 SC
Close with a sl st. Cut the yarn, leaving a tail for sewing.


Assembly

- Sew the fins in place
- Sew the snout on to the face
- Sew the coronet in place on top of the head

Read More

Crochet Strawberry Cow - Free Crochet Pattern

Monday 4 October 2021


Full Youtube tutorial available here
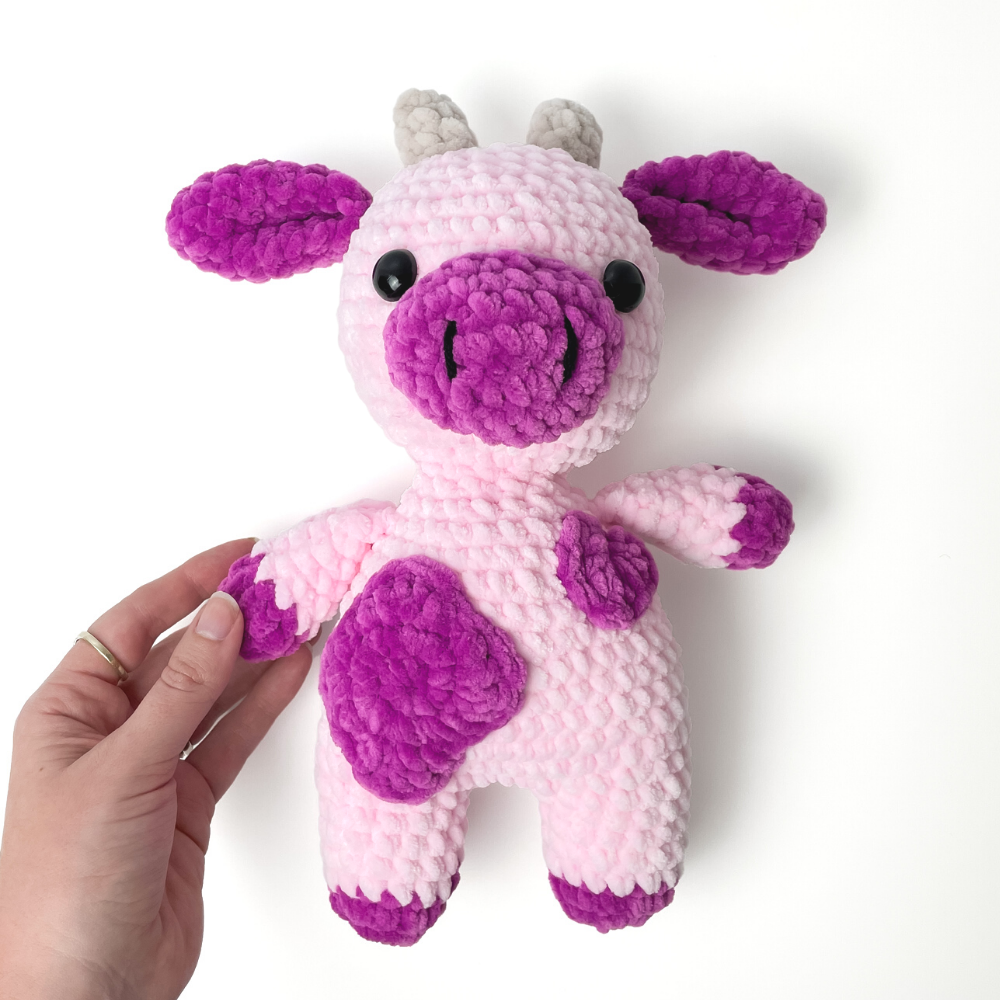
This is a crochet pattern to make this cute, chunky strawberry cow.
You can make it in whatever colours you like!


Yarn used

- Hobbii Baby Snuggle - Primary colour, secondary colour, beige for horns

- Small amount of medium black yarn for embroidering nostrils


Other Items used

- US G/4.25mm Crochet Hook
- Yarn needle
- 12-15mm safety eyes
- Poly fill
- Stitch markers (optional)

*Please note that safety eyes are NOT recommended for children under the age of 3 years.


Abbreviations and stitches

• MR: Magic ring
• St(s): Stitch(es)
• SC: Single crochet
• Sl st: Slip stitch
• DC: Double Crochet
• BLO: Back Loops Only
• Inc: Increase (Stitch 2 SC into the stitch)
• Dec: SC decrease using the invisible method
• (...) x n: Repeat instructions in brackets n times
**This pattern uses US Crochet Terms**


Pattern

Legs - Make 2

(Start with secondary colour)
R1: 6 SC in a MR
R2: 6 inc (12)
R3: (3SC, inc) x 3 (15)
Colour change to main body colour
R4-7: 15 SC

1st leg only: sl st to close, cut the yarn
2nd leg:
Ch 3 after R7, join to 1st leg with SC

Belly continues straight from here:

R1: 36 SC
(15SC in 1st leg, 3SC in ch3, 15SC in 2nd leg, 3SC in ch3)
R2: (5SC, inc) x 6 (42)
R3-7: 42SC
R8: (5SC, dec) x 6 (36)
R9: 36SC
R10: (4SC, dec) x 6 (30)
R11: 30SC
R12: (3SC, dec) x 6 (24)
R13: (2SC, dec) x 6 (18)

Stuff the body and legs


R14: (SC, dec) x 6 (12)
R15: 12 SC
R16: 12 inc (24)
R17: (SC, inc) x 12 (36)
R18: (5SC, inc) x 6 (42)
R19: (6SC, inc) x 6 (48)
R20-24: 48SC
R25: (6SC, dec) x 6 (42)
R26: (5SC, dec) x 6 (36)
R27: (4SC, dec) x 6 (30)

Attach eyes between R23 and R24, 10 sts apart

R28: (3SC, dec) x 6 (24)
R29: (2SC, dec) x 6 (18)
Stuff the head
R30: (SC, dec) x 6 (12)
R31: 6 dec (6)


Arms - Make 2

(Start with secondary colour)

R1: 6 SC in a MR
R2: 6 inc (12)
R3: 12 SC
Colour change to main body colour
R4: (2SC, dec) x 3 (9)
R5-8: 9 SC

Fold in half and close with SCs along the top. Cut the yarn, leaving a long tail for sewing.

Snout

(Secondary colour)

Ch 6
R1: SC in 2nd ch from hook, 3SC, 3SC in last st,
Underside: 3SC, inc (12)
Sl st into 1st st of round

R2: (3SC, 3 inc) x 2 (18)
R3: (3SC, [SC, Inc] x 3) x 2 (24)
R4: 24 SC
Close and cut the yarn, leaving a tail for sewing.

Ears

(Secondary colour)

R1: 6SC in a MR
R2: (SC, inc) x 3 (9)
R3: (2SC, inc) x 3 (12)
R4: (3SC, inc) x 3 (15)
R5-7: 15SC
R8: (3SC, dec) x 3 (12)

Fold in half, SC across the top to close. Cut the yarn, leaving a long tail for sewing.

Horns

(Beige)

R1: 4 SC in a MR
R2: (1SC, inc) x 2 (6)
R3-4: 6SC

Close with a sl st. Cut the yarn, leaving a tail for sewing.

Patches - Make 2

(Secondary colour)

R1: 8SC in a MR
R2: 8 inc (16)
R3: (HDC, 3 DC into 1 st, HDC, sl st) x 4 (24)

Close with a sl st. Cut the yarn, leaving a tail for sewing.

Heart patch

(Secondary colour)

Ch 2
In first ch: 2 DC, 2 HDC, DC, 2 HDC, 2 DC, ch 2, sl st back into ch. Pull the tail to make a heart shape.

Close and cut the yarn, leaving a tail for sewing.


Assembly

- Sew all parts together as per the video tutorial

- Embroider the nostrils


Read More